How to Add Attachments to an Order
Last updated: October 21, 2026
You can attach files to an order in your ShipHero portal at shipsfor.us. Attachments are commonly used for B2B and FBA prepaid labels, vendor routing guides and order customization instructions. Supported formats are PDF, PNG, JPG and CSV.
Warning: upload attachments before the warehouse starts on the order. Attachments aren’t printed automatically. An attachment added after the order is in progress may be missed, and the order can ship without it.
Steps
Open the order. Log in to shipsfor.us, click Orders in the left-hand menu, search for the order and click the order number.
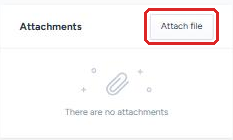
Click Attach file. Scroll to the Attachments section at the bottom of the right-hand column and click Attach file.
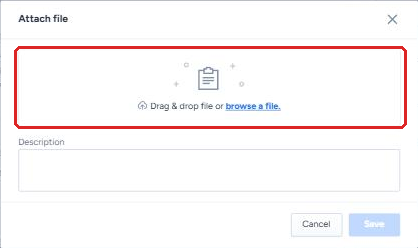
Choose the file. Drag your file into the window, or click browse a file to pick it from your computer.
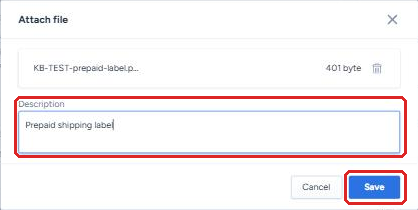
Add a description and save. Type a short Description, for example “Prepaid shipping label”. The Save button stays greyed out until you add one. Then click Save.
Verify
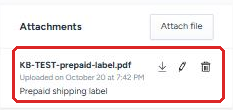
The file appears in the Attachments section with its description and upload date. Use the icons next to it to download, edit or delete it.
How attachments are processed
Attachments aren’t printed or packed automatically. Manifest has to route orders with attachments into a dedicated workflow on the warehouse floor.
Orders that always need attachments, such as every order for a specific retailer or with a specific tag, can be routed automatically with automation rules. Contact your Account Manager to set this up.
Warning: for one-off orders, hold the order before you attach the file. Put the order on hold, add the attachment, then contact your Account Manager. Only release the hold once your Account Manager confirms the order has been routed to the right workflow. If you skip the hold, the order can ship without the attachment.