How to Create an Inbound PO (Shipping Plan) in ShipHero
Last updated: October 21, 2026
Before sending inventory to Manifest, create an inbound PO, also called a Shipping Plan, in your ShipHero portal at shipsfor.us. The Shipping Plan generates the box labels needed for receiving compliance and tells Manifest's warehouse team what to expect.
There are two ways to create one: step by step in the portal, or by uploading a box manifest file.
Warning: every box needs its Shipping Plan label. Boxes that arrive without labels from a Shipping Plan, or with labels that don’t match what’s inside, go to an Unidentified Receiving Order (URO). That delays your stock going live, and relabeling is billed.
Before you start
Your products must already exist in ShipHero with scannable, unique barcodes at the unit level. If your products aren't barcoded yet, see Barcoding Your Products first.
Method 1: Create a Shipping Plan in the portal
Start the Shipping Plan. Log in to shipsfor.us and click Shipping plans in the left-hand menu. Click Create a shipping plan.
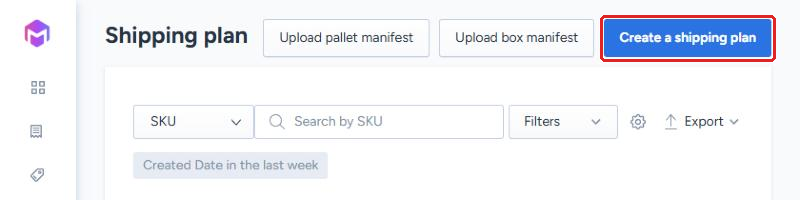
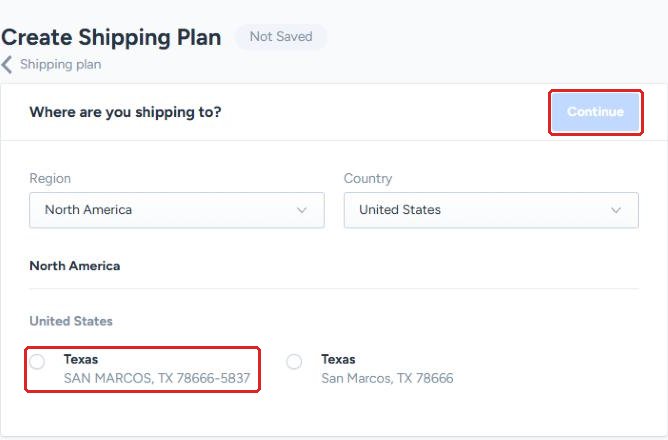
Choose the warehouse. Under Where are you shipping to?, select the Texas warehouse listed as SAN MARCOS, TX 78666-5837, then click Continue.
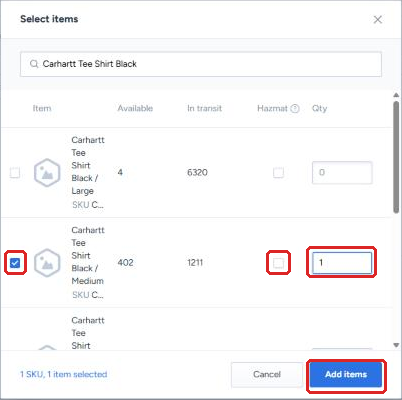
Add the items you're sending. Click the search box and search by name, SKU or barcode. In the Select items window, check the box next to each SKU and enter its Qty. Check Hazmat only if the item is a hazardous material. Click Add items.
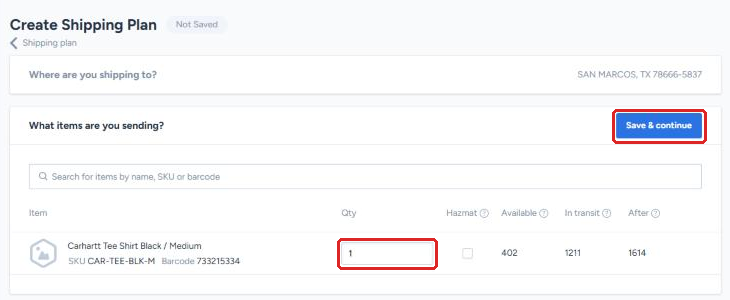
Check quantities and save. Review the quantity for each SKU, then click Save & continue. Your Shipping Plan is saved as a Draft at this point, so you can come back to it later.
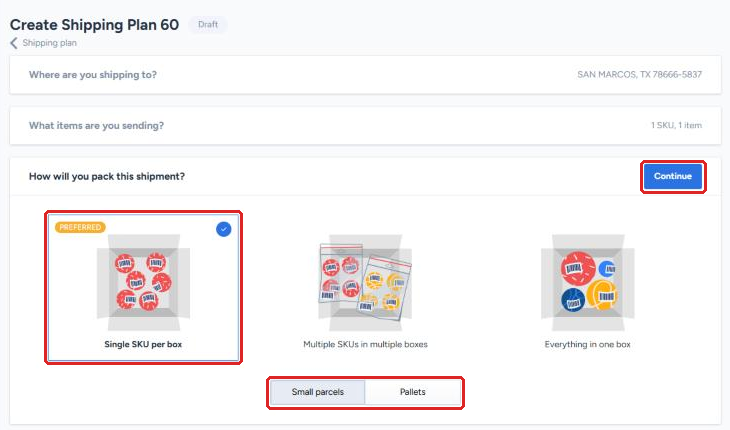
Choose how the shipment is packed. Select Small parcels for boxes or Pallets for freight, then choose a packing option:
Single SKU per box is preferred and is required to avoid non-compliance fees.
Multiple SKUs in multiple boxes and Everything in one box are mixed configurations.
Warning: mixed boxes cost more to receive. Boxes with more than one SKU are charged hourly labor at receiving. Pack one SKU per box wherever you can.
Click Continue.
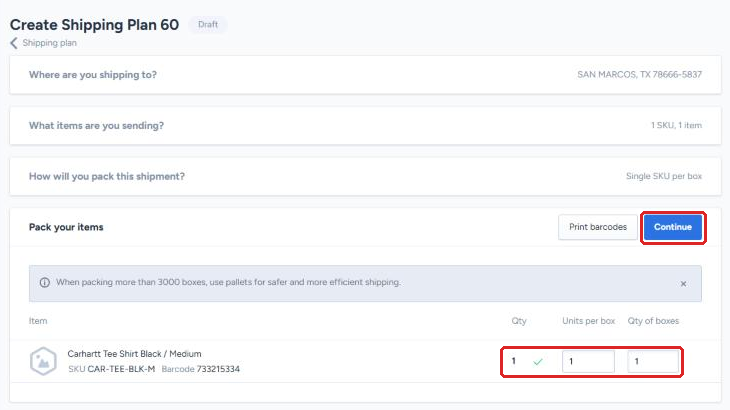
Enter the box counts. For each SKU, enter the Units per box and the Qty of boxes. A green check appears when the units across all boxes match the total quantity. Click Continue.
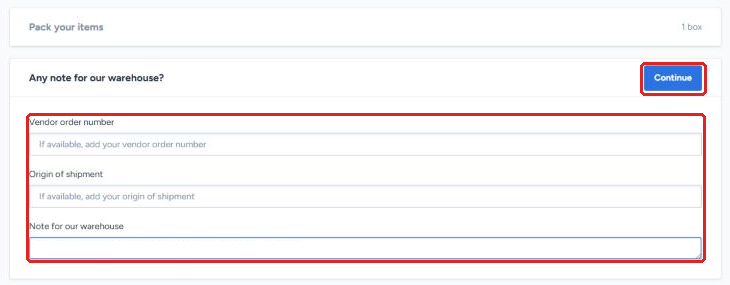
Add notes for the warehouse (optional). Add a Vendor order number, the Origin of shipment, or a Note for our warehouse if helpful. Click Continue.
Generate your labels. Review the label guidance, then click Generate packing list & finish. Your labels open in a new browser tab to print. If nothing opens, allow pop-ups for shipsfor.us and click Print on the Shipping Plan page.
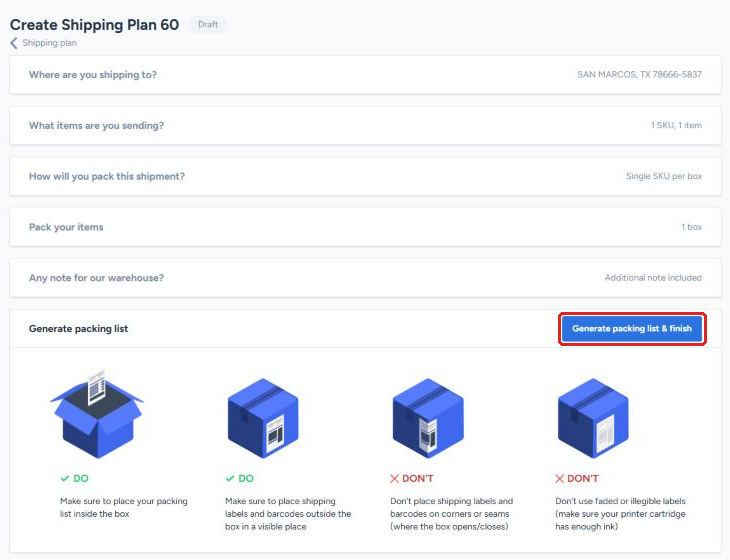
Each printed label has two parts. The left side goes on the outside of the box for warehouse scanning, and the right side is the packing list that goes inside the box. Don't place labels on corners or seams, and make sure they print clearly.
Method 2: Upload a box manifest
Uploading is recommended for large or complex shipments with many SKUs across many boxes.
On the Shipping plans page, click Upload box manifest.
Fill in the Box Manifest template with the SKU, box number and quantity per box for each line. A sample file is attached at the bottom of this article. Save it as a CSV file; Excel files aren't accepted.
Select the warehouse and vendor for the shipment, attach your CSV and click Save.
Once the Shipping Plan is created, open it and wait for the status to change from Processing before printing labels. Parcel Shipping Plans are limited to 200 boxes, so split larger shipments into multiple Shipping Plans.
For palletized freight, use Upload pallet manifest on the Shipping plans page instead.
After you create your Shipping Plan
Your Shipping Plan opens as a PO, for example PO 60. From this page you can:
Reprint labels using Print next to Shipping plan details, or print unit barcodes with Print Item Barcodes.
Add tracking. Click Add tracking number, choose the carrier and enter the tracking number, then click Save tracking numbers. For freight, enter the PRO or BOL number. Tracking helps the warehouse plan for your delivery.
Set the Expected date to when the shipment should arrive.
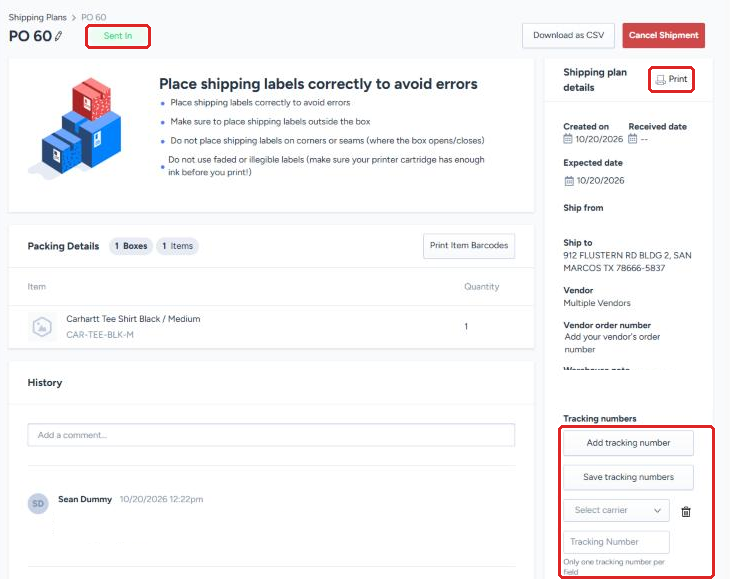
Take note of your PO number. You'll need it to book your delivery appointment. See How to Schedule an Inbound Dock Appointment Through OpenDock.
Attachments:box_manifest_example.csv